Technical Support
Touch Light Switch Installation Guide
Installation Warnings
Read the instructions carefully before starting the installation process and keep them for future reference. This product must be installed by a qualified electrician.
1. This product should be installed after shutting off the general power supply.
2. The glass panel can NOT be put on directly with the power on. Until you have finished all the installation, then you can turn on the general power.
3. The Max Power is 300W/Gang. Do Not overload to use this product.
Installation
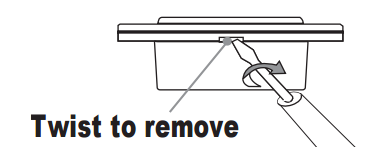
1. Remove the glass panel of your Smart Light
Switch Using a small flat screwdriver remove the front cover by placing the screw driver in the location notch on the bottom part of the cover and twist to unclip the cover.
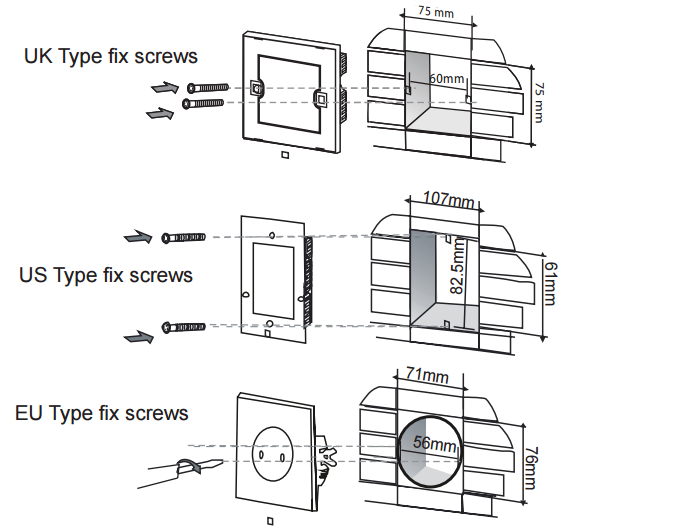
2. Fix screws (see wiring instructions overleaf)
Use the screws supplied to attach switch to back box using a screwdriver.
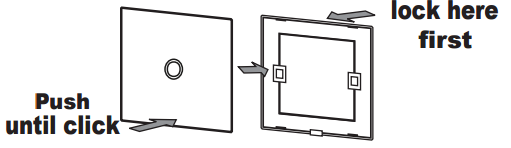
3. Reattach the glass panel
Align the glass panel over the switch and firmly push to click into place.
4. Power on
Once the power is on, wait 2 minutes for the switch to power up, then touch the panel to turn on the light. (If when pressing the panel your light flashes on only once then off please refer to ‘Adding a Capacitor’ overleaf).
Adding a Capacitor
A single flash occurs when the standby current of the light switch is more than the standby current of the bulb, when the switch is off (especially for bulbs which are less than 5W).To solve this issue get an electrician to remove the light fitting and add the capacitor included to the neutral and live connections. Repeat set-up steps.
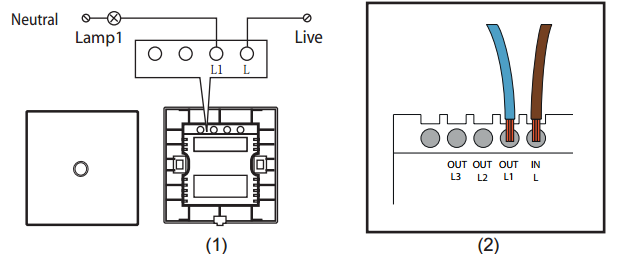
Wiring
Push wires firmly into terminals and tighten terminal screws so that wires are held securely. No bare wires should protrude from the terminals. Ensure correct wires are connected to the correct terminals, if incorrectly wired, this could damage the switch.
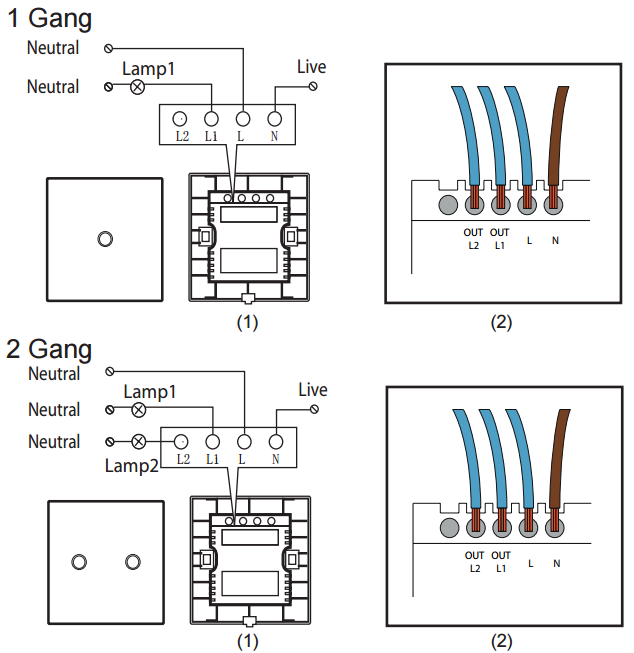
1 Gang Model – Wiring for EU, UK, US Model, please refer to Picture(2).
– The same way to 1Gang dimmer switch, 1Gang timer switch, fan switch, doorbell switch.
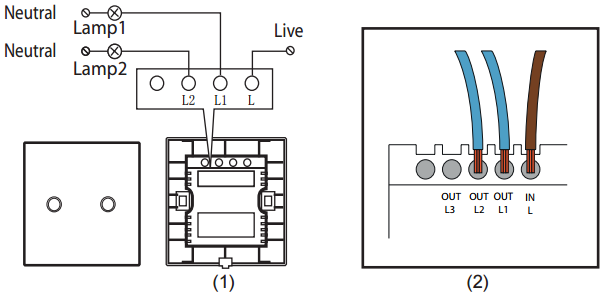
2 Gang Model – Wiring for EU, UK, US Model, please refer to Picture(2).
– The same way to electric curtain switch.
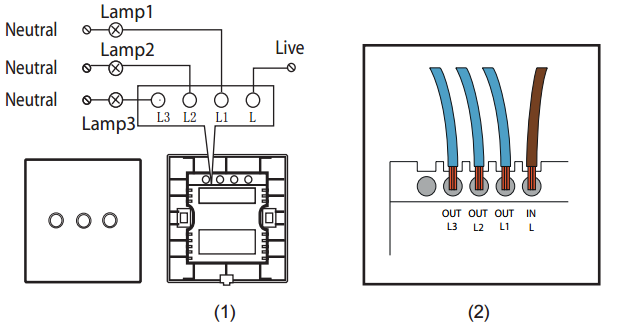
3 Gang Model – Wiring for EU, UK, US Model, please refer to Picture(2).
4 3Gang 2 ways Intermediate model
5 1000W Model (Writing for UK/US Model, please refer to Picture(2).
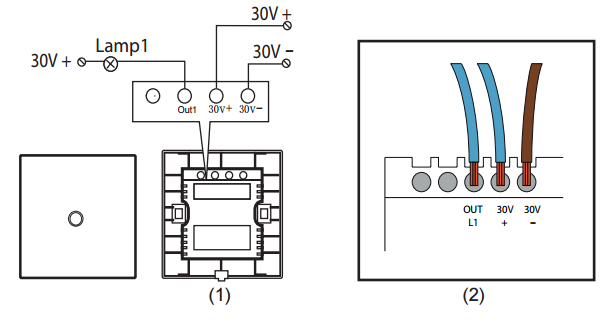
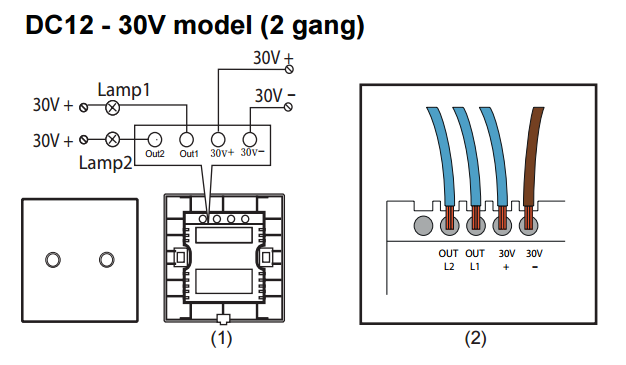
6 DC12–30V (1 Gang)
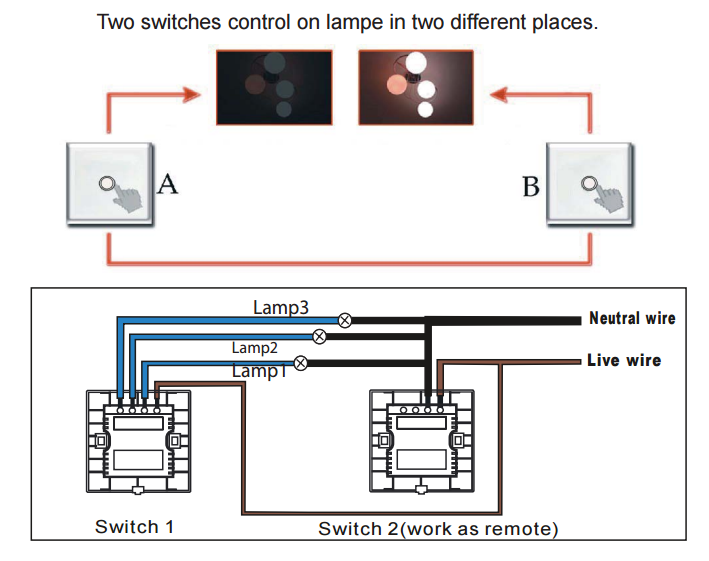
Connecting with the Wireless Remote
1. Press and hold the Smart Light Switch Button
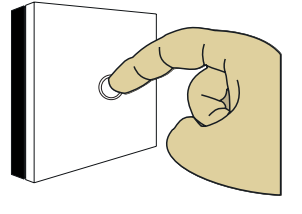 Turn on the light, press and hold the light switch button for 3 seconds until your bulb changes the state from on to off (It indicates the switch goes into the learn mode).
2. Press and hold the Remote’s button
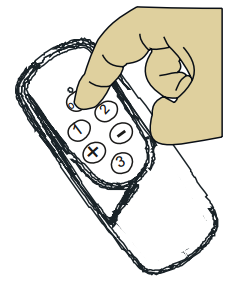 Once the light switch goes into the learn mode,then press and hold the Remote’s button for 2 seconds, your bulb will be turned on again. The smart Light switch is connected with the wireless Remote.
You can turn ON/OFF your Smart Light Switch Panel yourself as well as by Manually by touching the glass Pressing the Remote’s buttons.
3. Continue connecting the other Gangs with Remote
If the smart light switch is more than 1Gang, then you can learn the other switch’s buttons with the other buttons of the Remote by repeating steps 1 and 2 above.
Note (Exit Learn Mode):
Once the light switch goes into the learn mode, no changes will happen within 10 seconds while you press any switch’s button. After 10 seconds, the switch will exit the learn mode automatically. Additional Features Reset To disconnect a Smart Light Switch from the Wireless Remote: press and hold one button for 10 seconds, then the memory is clear and the unit has been reset. It is now ready to be reconnected to your Remote. If the switch failed to connect with the Remote, please repeat steps 1 and 2 above.
Connecting the dimmer switch with Remote
1. Press and hold the Smart Light Switch Button
Turn on the light, press and hold the ‘+’ button for 5 seconds until your bulb changes the state from the brightest to 50% brightness. (It indicates the switch goes into the learn mode).
2. Press and hold the Remote’s button
Once the light switch goes into the learn mode,then press and hold the Remote’s button ‘+’ for 2 seconds, the dimmer button ‘+’ is connected with the ‘+’ button of the Remote.
3. Continue connecting other buttons
Turn on the light, press and hold the ‘-’ button for 5 seconds until your bulb changes the state from the weakest to 50% brightness.Then press and hold the Remote’s button ‘-’ for 2 seconds, the dimmer button ‘-’ is connected with the ‘-’ button of the Remote. You can connect ON/OFF button by repeating steps 1 and 2 of last page.
Additional Features
Reset
To disconnect a Smart Light Switch from the Wireless Remote: press and hold one button for 10 seconds, then the memory is clear and the unit has been reset. It is now ready to be reconnected to your Remote.
Connect with Home Automation System
Learn Mode:
Turn off the light, press and hold the light switch button for 5 seconds until your bulb flashes (It indicates the switch goes into the learn mode, the switch will be ready to match with the system.)
Note:
When the smart light switch has connected with the system, the ALL OFF function is included to the system as well.
Troubleshooting
For solutions to any other problems, please contact your supplier.
Specification
Voltage: 110- 240V AC/ 50~60Hz
Operating Power: less than 300W/Gang
Remote range: 20M
Remote battery: 12V,23AE
Frequency: 433Mhz
Warranty
Your products come with a 12 month manufacturer’s warranty as standard. This warranty covers defects in manufacturing that arise from the correct use of the device. It is limited to defects in materials or workmanship and does not cover damage caused by abuse, misuse,unauthorised modification, power surge damage or extreme heat or cold or corrosive environments.
The warranty also does not cover the normal wear and tear on covers, cases, housings, connectors and accessories. The warranty does not apply to any product with missing, altered or defaced serial numbers.


